October 6, 2014|
Credit to Kaphotics, for his amazing text ROM dumps.
| Mario: F.L.U.D.D. | A blast of water is an effective way to disrupt your opponents. It doesn’t hurt, but it can slide them around. |
| Wario: Chomp | Can be used to bite opponents or eat items. If he eats food, it’ll restore more health than usual! |
| Marth: Shield Breaker | This move leaves you wide open, but if you charge it to maximum, it can break an enemy’s shield in a single hit. |
| Villager: Timber | The axe is surprisingly powerful! You can swing it at your rivals as long as the tree is standing. |
| Link: Bomb | Your bombs are special ones—the explosion from hitting an enemy won’t hurt you. |
| Kirby: Stone | While falling, you can cancel the attack by entering the move a second time. It’s a perfect way to trick other players! |
| Captain Falcon: Falcon Punch | After pressing the attack button, quickly turn around to make Captain Falcon unleash an even more powerful attack as he turns. |
| Wii Fit Trainer: Header | Shield before hitting the ball to cancel your serve and let the ball fall, dejected, to the ground. |
| Wii Fit Trainer: Sun Salutation | Fully charge the attack before striking to recover a bit of health. Talk about flexible! |
| Peach: Side Smash Attack | Peach pulls out a tennis racket, a golf club, and then a frying pan. Remember that order! |
| Sonic: Spring Jump | Use this in midair to drop a spring on someone below. Give yourself a boost while disrupting your rivals! |
| Luigi: Green Missile | This move can end with Luigi’s head stuck in a wall. That leaves him vulnerable, so be careful! |
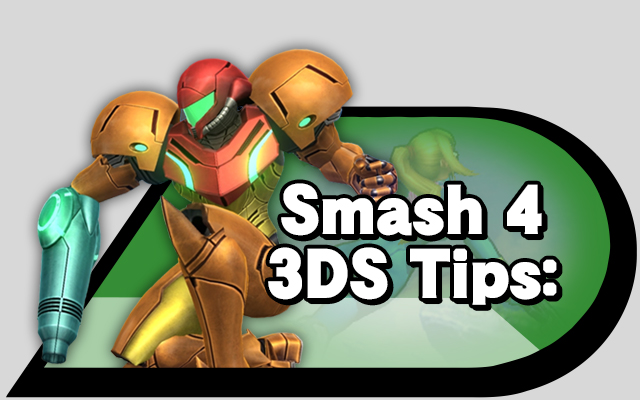
| Samus: Charge Shot | This is devastating when fully charged. It can be unleashed instantly if you fire it while airborne. |
| Kirby: Taunt | Taunt to discard your current copy ability. Find the most opportune moment to change your abilities! |
| Link: Hylian Shield | Link’s Hylian Shield can block projectiles, but it won’t block anything while you’re attacking. |
| Mr. Game & Watch: Judge | This move’s power depends on the number displayed. Swinging a 1 is nearly useless, but a 9 has incredible launching power! |
| Olimar: Yellow Pikmin | The Yellow Pikmin has a wide attack range but deals low damage. Electric attacks won’t hurt it. |
| Wario: Wario Bike | Wario’s motorcycle can break into parts. Throw them at others, or eat them to fill Wario’s…gas tank. |
| Luigi: Green Missile | This move has a 1-in-10 chance to hit REALLY hard and fly REALLY far. Too far, in some cases. |
| Luigi: Green Missile | Charge this for too long, and he’ll get worn out and give up. Let him catch his breath, and then try again. |
| Kirby: Stone | Kirby’s form is different each time he uses this, but the move’s effect is the same. |
| Kirby: Hammer | If fully charged, this move becomes very powerful, but Kirby will begin to take damage at full charge. |
| Olimar: Pikmin Pluck | Olimar will always pluck the Pikmin in this order: red, yellow, blue, white, purple. |
| Olimar: Pikmin Order | This move will change the order of your Pikmin. Use it to plan your attack strategy. |
| Olimar: Winged Pikmin | Two Winged Pikmin carry Olimar. The more Pikmin he has, the harder it is to pull him up. |
| Link: Side Smash Attack | Press the button again to attack a second time. The second attack has more launching power. |
| Peach: Vegetable | The vegetables’ emotions are picked at random. The sort-of-wrinkled-looking ones deal the most damage. |
| Peach: Gliding | Holding the jump button will let Peach hover in the air for a short time. She can even attack as she floats! |
| Peach: Peach Parasol | Press up and down to open and close your parasol and adjust your fall speed. |
| Bowser: Tough Guy | Bowser’s a real tough guy. When he’s only lightly damaged, weaker attacks won’t make him flinch. |
| Zelda: Phantom Slash | Zelda’s Phantom can take some damage, but if it’s destroyed, she can’t summon another for a while. |
| Mr. Game & Watch: Oil Panic | This bucket can hold all manner of projectiles. Once filled, unleash the contents on an unsuspecting foe. |
| Fox: Reflector | This move can reflect projectiles, and it also damages nearby opponents when activated. |
| Falco: Blaster | Unlike Fox’s blaster, Falco’s blaster can make opponents flinch. It fires faster when airborne. |
| King Dedede: Inhale | Dedede is already perfect, so his inhale won’t copy abilities. Instead, it has a longer range than Kirby’s. |
| Charizard: Rock Smash | The rock shards will fly in random directions. Get close to your target to maximize damage. |
| Villager: Down Air Attack | One to three turnips will appear. More turnips means more damage. Three has a meteor effect. |
| Mega Man: Metal Blade | If a Metal Blade gets stuck in a wall or floor, other fighters can pick it up and use it. |
| Wario: Chomp | Eating items will make Wario more gassy. The gassier he is, the stronger his down special will be. |
| Falco: Falco Phantasm | Falco Phantasm can send an airborne enemy straight down—use it to dunk them into the abyss! |
| Wii Fit Trainer: Deep Breathing | Deep Breathing can reduce stress. Oh, and it also increases your attack and launch power and heals a small amount of damage. |
| Wii Fit Trainer: Standard Attack | Land three weak attacks in a row, and you’ll bury your opponents in the ground for a time. |
| Greninja: Hydro Pump | Aim the water jets by pressing in a particular direction. You can then quickly press a different direction to go that way with the second burst. |
| Marth: Counter | The counter depends on the attack it is countering. A countered smash attack may KO an opponent! |
| Jigglypuff: Shield | If Jigglypuff’s shield is shattered, it’ll get launched and KO’d no matter its damage. |
| Ness: Side Smash Attack | Ness’s bat leaves him open to attack, but it has epic launching power. He can even hit projectiles with it! |
| Zelda: Din’s Fire | This explodes when you release the button. Hold it longer to get more range and a stronger explosion. |
| Zelda: Phantom Slash | Charge this attack to make the Phantom travel farther. It’ll attack differently based on the distance traveled. |
| Zero Suit Samus: Flip Jump | Fighters struck while on the ground will be buried, while airborne fighters will be meteored. |
| Meta Knight: Flurry Attack | Press the attack button to unleash a flurry of strikes. Meta Knight doesn’t do “standard attacks.” |
| King Dedede: Strong Down Attack | He can attack while prone by cartwheeling forward. This lets him attack while moving, like a dash attack. |
| Charizard: Rock Smash | Right before smashing a rock, Charizard gets super armor, meaning it won’t even flinch if it’s attacked! |
| Wii Fit Trainer: Up Smash Attack | You’re invincible for a moment just before unleashing this. Try using it to launch foes attacking from above. |
| Villager: Balloon Trip | Your balloons can be popped by your foes. Lose one and you’ll lose lift. Lose both and down you go! |
| Greninja: Hydro Pump | The water flow doesn’t just cause damage—it can also push your foes if you hit them just right. |
| Villager: Lloid Rocket | Hold the button when using this move to ride on the Lloid Rocket. |
| Little Mac: Jolt Haymaker | You get a window of invincibility if you start this move on the ground, but not in the air, so be careful! |
| R.O.B.: Robo Beam | After charging, R.O.B. fires a beam from his eyes. The red light on his head shows the charge level. |
| Samus: Missile | Holding a direction will fire a Homing Missile, while quickly inputting a direction will fire a Super Missile! |
| Pikachu: Thunder | The bolt of lightning has a meteor effect. Use it after throwing a foe upward for a powerful combo. |
| Ness: PSI Magnet | This move absorbs energy-type projectiles and heals Ness as a result. |
| Peach: Side Smash Attack | The tennis racket launches farthest, the golf club has the best reach, and the frying pan hurts the most. |
| Peach: Low Gliding | Jump while crouching to float just above the ground. You can use air attacks quickly that way! |
| Rosalina: Controlling Luma | Luma can attack even if Rosalina is stunned or sleeping. This can save you in a pinch. |
| Donkey Kong: Headbutt | Use this move to bury your opponents if they’re on the ground or meteor-smash them in midair. |
| Mario: Front Air Attack | It’s a slow attack, but Mario swings his fist down hard enough for a meteor smash as it begins. |
| Mr. Game & Watch: Chef | Food jumps out of Mr. Game & Watch’s frying pan in all directions. Use this to protect yourself. |
| Diddy Kong: Peanut Popgun | Overcharging the Peanut Popgun makes it backfire, but it’ll do a ton of damage to foes that it hits! |
| Mr. Game & Watch: Oil Panic | This will only absorb energy-style projectiles. It won’t affect physical ones like Link’s arrows. |
| Olimar: Pikmin Order | Olimar’s whistle calls back his scattered Pikmin. Even the ones that are goofing off. |
| Donkey Kong: Hand Slap | DK’s Hand Slap affects a large area around him. However, it won’t hit airborne fighters. |
| Meta Knight: Strong Side Attack | The third strike of Meta Knight’s side strong attack is powerful enough to launch opponents. |
| Jigglypuff: Rest | Opponents launched by Rest will get a flower on their heads. Talk about insult to injury. |
| Mega Man: Leaf Shield | Grab someone while the Leaf Shield’s up, and you can do a combo attack: a throw plus the damage from the leaves. |
| Zero Suit Samus: Paralyzer | Attack with this to paralyze foes for just a moment. When they can’t move, that’s your chance to strike! |
| Meta Knight: Drill Rush | While Meta Knight’s rushing through the air like a drill, you can adjust his direction. |
| Meta Knight: Mach Tornado | The tornado created around Meta Knight can destroy any weak projectiles it hits. |
| R.O.B.: Arm Rotor | The spinning arms can deflect enemy projectiles. Also, press the button repeatedly for a slightly longer attack! |
| R.O.B.: Robo Beam | The beam can be angled up or down. Also, if it hits the ground, it’ll reflect and change direction. |
| Ness: PK Fire | If this attack connects, a big pillar of fire appears. “I feel the burn!” your foes will yell. |
| Ness: PK Thunder | You can guide the bolt of lightning around and hit yourself for propulsion—but this leaves you defenseless, so be careful! |
| Ness: Up Smash Attack | Ness’s yo-yo flies forward and then swings up and around to the back for a wide-ranging, heavy-hitting attack. |
| Sonic: Spin Charge | Jump while spinning forward, and you’ll keep spinning in the air. You can hit opponents like that or use other attacks. |
| Charizard: Flare Blitz | This move engulfs Charizard in flames. It’s extremely powerful, but it hurts Charizard too. |
| Ike: Standard Attack | There are three levels of attack: a punch, a kick, and a sword swing. All pretty handy, since they’re quicker than Ike’s other moves! |
| Pit: Palutena Bow | Press up before firing to aim the arrow that way. Also, you can guide the arrow while it’s in the air. |
| Pit: Upperdash Arm | A dash forward followed by an uppercut. While Pit is dashing, the Upperdash Arm deflects projectiles! Cool! |
| Pit: Guardian Orbitars | These handy items will block enemy attacks as well as reflect projectiles. They’ll even push back foes who touch them! |
| Mega Man: Crash Bomber | This bomb is incredibly clingy, latching on to walls, floors, and even fighters! It can be given to another fighter by bumping into them. |
| Link: Dash Attack | Link’s dash attack strikes with almost as much force as a smash attack. The point of his sword is especially painful. |
| Bowser: Whirling Fortress | Repeatedly pressing the button while using this in midair will give you a small boost in how high you fly. |
| Bowser: Fire Breath | Fire Breath loses power the longer it is used. Waiting a short time between bursts will allow it to recharge. |
| Ike: Aether | Ike will be protected from flinching while he prepares this attack. This move can send foes flying upward! |
| Kirby: Jump | Kirby’s light body lets him jump five times—more than most other fighters. If Kirby gets launched but not cleared, you can almost bet he’s coming back! |
| Bowser: Bowser Bomb | Bowser will leap into the air hornsfirst. Hitting an opponent on the way up makes it much easier to clobber them again on the way down. |
| Meta Knight: Dimensional Cape | Meta Knight wraps himself in his cape and disappears. Keep holding the button, and he’ll strike when he’s back! |
| R.O.B.: Back Air Attack | When R.O.B. fires the burner on his base, the force of the attack will move him forward a bit. |
| Lucario: Aura | Lucario’s launching potential is directly related to how much damage this Pokémon has taken. The power of Lucario’s Aura radiates off its hands. |
| Fox: Blaster | The blaster fires quickly, and its shots go a long way, but enemies won’t flinch when they’re hit, so use this at a safe distance. |
| Rosalina & Luma: Star Bits | Luma fires Star Bits that can scatter in three directions: high, middle, and low. |
| Marth: Dancing Blade | Keep pressing the button to turn this into a four-hit combo. Holding different directions will change the angle of the strike! |
| Marth: Dancing Blade | Marth’s sword leaves a trail as he swings it, and the color reflects the attack’s height. Blue is high, red is middle, and green is low. |
| Falco: Reflector | Falco kicks his Reflector forward, making it possible to both reflect projectiles and hit foes at the same time! |
| Charizard: Flare Blitz | There’s a big explosion when Charizard hits a fighter or an obstacle. This can hit other nearby fighters, too! |
| Zelda: Farore’s Wind | Zelda will deal damage to those nearby when she disappears and reappears. Hold a direction to control where she teleports to. |
| Marth: Dancing Blade | Press down on the fourth swing to finish your combo with a powerful blow to your opponent’s feet! |
| Marth: Dancing Blade | Press up on the fourth swing for a slice that will launch your foes. This swing is excellent for netting some KOs! |
| Shulk: Monado Arts | Shulk switches between five modes—Jump, Speed, Shield, Buster, and Smash—that change his abilities for a short time. |
| Diddy Kong: Monkey Flip | If you grab someone in the air, you’ll release them more quickly than if you grab them on the ground. Be ready to use a speedy follow-up attack. |
| Diddy Kong: Banana Peel | You can’t whip out another Banana Peel if one of yours is still in play, but each one will vanish after being thrown twice. |
| Olimar: Pikmin Pluck | You can have up to three Pikmin in tow at any time. Plucking for more while three are already active is, sadly, futile. |
| Mega Man: Rush Coil | Summoning Rush into battle will help Mega Man reach even greater heights. Unfortunately, foes can use him as well! |
| Mega Man: Up Air Attack | Mega Man can launch a little tornado upward. If an opponent gets caught in this minigale, it’ll carry them up into the air! |
| Wario: Taunt | Leave it to Wario to taunt while riding a motorcycle. Don’t try this at home! Or anywhere else! Not safe! |
| Diddy Kong: Rocketbarrel Pack | You can indicate a direction while this is charging to fly in that direction. You can even steer while flying! |
| Mega Man: Side Smash Attack | Mega Man unleashes a powerful Charge Shot. The damage and distance increases the longer you charge it! |
| Mii Brawler: Head-On Assault | This downward headbutt has a meteor effect, and it will bury opponents on the ground who get caught beneath it. |
| Mii Swordfighter: Blade Flurry | A flurry of sword slashes right in front of you, followed by a stab forward. Good for keeping your opponents at a safe distance! |
| Mii Brawler: Piston Punch | This series of upward punches isn’t so great for recovering. However, it’s a powerful move to use against opponents. |
| Mii Brawler: Headache Maker | After a big jump, the Mii Brawler swings down with both arms. At that exact moment, this move has a meteor effect. |
| Mii Gunner: Charge Blast | This move is super powerful when fully charged. Use it in midair, and it’ll fire without charging at all. |
| Mii Gunner: Flame Pillar | If you make a pillar of fire on the ground, it’ll deliver a single hit to anyone who comes close, pushing them back. |
| Captain Falcon: Front Air Attack | There’s a violent knee jab at the start of this move. Connect with that for some serious launching power. |
| Lucario: Aura Sphere | Other fighters can be damaged by the Aura Sphere as Lucario charges it. The size of the sphere is affected by Lucario’s Aura. |
| Lucario: Extreme Speed | This move will send Lucario flying in the direction you indicate. The more damage Lucario has taken, the farther it will fly. |
| Lucario: Force Palm | Force Palm deals more damage and has a greater range if Lucario’s Aura is stronger. |
| Wario: Chomp | Wario’s hunger knows no bounds, but eating explosives will cause him a bit of damage. The blast will hurt those around him, too! |
| PAC-MAN: Bonus Fruit | Cherries fly in a low arc. After hitting the floor, they’ll only bounce once. |
| PAC-MAN: Bonus Fruit | Oranges don’t deal much damage, but they fly straight and at high speed, making it pretty easy to hit foes with them. |
| PAC-MAN: Bonus Fruit | Keys fly forward at high speed while spinning. They deal the most damage out of all the Bonus Fruit items. |
| Donkey Kong: Spinning Kong | This move doesn’t offer a lot of lift, but it can carry Donkey Kong a fair distance left or right. |
| Olimar: Lead Pikmin | Olimar always attacks with the Pikmin at the front of the line. You can tell which one this is by the arrow pointing to it. |
| Luigi: Down Taunt | If your foe’s clinging to an edge for dear life, try using Luigi’s down taunt. That meteor smash will be VERY satisfying! |
| Marth: Dancing Blade | Hold toward the foe you’re attacking on the fourth swing for an attack that launches foes much farther than the up or down versions. |
| Link: Hylian Shield | Link’s Hylian Shield blocks all projectiles, no matter how powerful. Link won’t take any damage at all. |
| Donkey Kong: Forward Throw | Donkey Kong can pick up opponents and carry them around! Try to throw them before they shake free, though. |
| Diddy Kong: Peanut Popgun | While charging, watch for when Diddy grabs his hat! That’s the sign that the Peanut Popgun’s about to backfire. |
| Diddy Kong: Banana Peel | In this move, Diddy throws a banana peel behind him. Foes who step on it fall clumsily to the ground. Have a nice trip! |
| Olimar: Pikmin’s Stamina | When separated from Olimar, Pikmin are very vulnerable to enemy attacks. |
| King Dedede: Super Dedede Jump | After leaping up high, Dedede crashes down to attack. This move can be canceled partway through by pressing up. |
| Mii Swordfighter: Airborne Assault | The Mii performs a somersault leap forward in a large arc. If it strikes a foe, they will be blasted back and the user will jump upward. |
| Mii Gunner: Lunar Launch | The Mii fires straight down, using the recoil to gain height. How fortunate if an opponent gets caught in the blast as well! |
| PAC-MAN: Bonus Fruit | PAC-MAN’s strawberry flies a little farther than other fruit and bounces twice when it lands. |
| PAC-MAN: Bonus Fruit | PAC-MAN’s melon moves slowly through the air, so it’s harder to hit opponents with. But when it does hit home, it deals quite some damage. |
| PAC-MAN: Fire Hydrant | PAC-MAN places a fire hydrant on the ground. The water that it spurts will push fighters back. |
| PAC-MAN: Fire Hydrant | Use this attack in the air, and the falling hydrant itself becomes a form of attack. Try dropping it on an opponent trying to return to the stage! |
| Duck Hunt: Duck Jump | The duck grabs the dog and carries him through the air. Once started, this move can’t be stopped. |
| Bowser Jr.: Abandon Ship! | Bowser Jr. abandons his Junior Clown Car and performs a massive leap. After a short delay, the abandoned vehicle will self-destruct. |
| Bowser Jr.: Clown Kart Dash | The Junior Clown Car becomes a kart and charges forward. The higher the speed, the more damage it will deal. |
| Bowser Jr.: Mechakoopa | The Junior Clown Car spits out a Mechakoopa, which explodes on contact with an enemy. It’ll explode if you just leave it alone for a while, too. |
| King Dedede: Jet Hammer | It’s possible to charge this move to deal more damage, but charging for too long will start to hurt Dedede too! |
| Mii Swordfighter: Reversal Slash | A gust of wind from the Mii character’s sword sends projectiles back the way they came. It can also flip opponents around if they get too close. |
| Yoshi: Egg Roll | You can start this move in the air, but you won’t deal any damage until you hit the ground. |
| Little Mac: Side Smash Attack | If you press up when performing Little Mac’s side smash, it will change into an uppercut that sends enemies flying upward. |
| Ganondorf: Wizard’s Foot | Used on the ground, this move is a horizontal flying kick. In the air, it goes downward instead and has a meteor effect at the very start. |
| Zero Suit: Attacking from Above | This move sends Zero Suit Samus diagonally downward while attacking. When she lands, the impact damages enemies around her. |
| Villager: Lloid Rocket | The Lloid Rocket is more powerful when you’re riding it, but you can bail at any time just by pressing the button. |
| Meta Knight: Shuttle Loop | Meta Knight thrusts his sword upward, loops in midair, and then thrusts upward once more. A swift and powerful attack, useful against falling foes. |
| Charizard: Strong Up Attack | Charizard’s wings won’t take damage, making this good for overpowering foes striking from overhead. |
| Ganondorf: Strong Down Attack | A crouching kick that sends opponents flying upward. It has good reach and is one of Ganondorf’s faster attacks. |
| Shulk: Back Slash | Shulk leaps forward and performs a vertical slice downward. As the name implies, it deals more damage if you hit the enemy from behind. |
| Diddy Kong: Rocketbarrel Boost | If someone attacks Diddy Kong when he’s wearing his Rocketbarrel Pack, it’ll break free and fly off on its own. |
| Mii Brawler: Up Smash | An upward-kicking backflip. Your legs are invulnerable while you perform it, so it’s perfect for countering enemy attacks from above. |
| Mii Brawler: Feint Jump | A long leap forward while turning upside down. If you hit the attack button on the way down, you’ll perform a jump kick. |
| Mii Brawler: Helicopter Kick | When performing this move, pressing left or right will let you change the direction of the kick. |
| Wii Fit Trainer: Deep Breathing | Press the button again just as the outer circle meets the red inner circle, and you’ll boost your attack and launching power for a while. |
| Ike: Aether | During the downward strike, this attack has a meteor effect. You’ll fall straight down until you hit solid ground, so make sure you aim well! |
| Ike: Eruption | A downward stab that summons raging flames around you. Gets stronger the longer you charge it, and the tip of the blade has a meteor effect. |
| Kirby: Inhale | If you press the attack button after sucking an enemy in, you’ll spit them back out. Use enemies to attack other enemies! |
| Kirby: Final Cutter | Kirby slices up into the air and then slices straight down again. The shock wave that appears when you land can also damage your opponents. |
| Ganondorf: Flame Choke | After being grabbed by this move, it’s possible to recover just before being slammed to the ground. |
| Captain Falcon: Falcon Dive | A leaping grab that sends the opponent flying with explosive force. If it connects, you’re free to use the same attack again without landing. |
| Bowser Jr.: Clown Cannon | This move fires a cannonball from the Junior Clown Car. The longer this attack is charged, the faster and more powerful it will be. |
| Greninja: Substitute | This move makes an enemy attack hit a substitute instead of you. You then reappear somewhere else and attack! |
| Samus: Bomb | Samus morphs into a ball and drops a bomb. You can use the explosion to gain a little height. |
| Shulk: Monado Arts | In Speed mode, you’ll sacrifice damage and jump height in order to move faster. |
| Shulk: Monado Arts | In Shield mode, the power of your shield is boosted but you can’t move as fast, jump as high, or deal as much damage. |
| Shulk: Monado Arts | In Buster mode, you deal more damage than usual but you can’t launch opponents as far and you’ll receive more damage. |
| Shulk: Monado Arts | In Smash mode, you can launch opponents more effectively but you deal less damage and can be launched more easily yourself. |
| Zelda: Nayru’s Love | This move summons a magical barrier that reflects enemy projectiles. It’s not just for defense, either—it also deals direct damage! |
| Zero Suit Samus: Plasma Whip | This move swings a whiplike stream of plasma directly in front of Zero Suit Samus. Opponents struck by the very tip of it will be blasted away. |
| Zero Suit Samus: Down Smash Attack | This attack fires Zero Suit Samus’s Paralyzer diagonally down. Its victim will be stunned for a moment, leaving them open to another attack! |
| Sonic: Spin Charge | If you hold down and keep tapping the button, you can charge up this move, making it faster and stronger. |
| Diddy Kong: Monkey Flip | While performing this move, you can press the attack button to launch a flying kick that deals considerable damage and has good launching power. |
| Diddy Kong: Monkey Flip | After grabbing on to an opponent with this move, press the attack button to launch them sideways or press up to jump off their head! |
| King Dedede: Gordo Throw | Choose up, middle, or down right after starting this move to hit the Gordo in three different ways, changing how it bounces. |
| King Dedede: Inhale | After inhaling an opponent, press the button again to spit them out as a projectile. This way, you can hit your opponents with each other! |
| PAC-MAN: Pac-Jump | This move sets up a trampoline for PAC-MAN to jump on. If you jump on it repeatedly, you’ll go higher with each bounce! |
| PAC-MAN: Bonus Fruit | PAC-MAN’s apple bounces repeatedly across the ground. It travels quite a distance! |
| Palutena: Autoreticle | Targets an opponent ahead of you and fires shots at them. No shots will be fired if obstacles prevent you from finding a target. |
| Palutena: Warp | Palutena disappears and then warps to a location a short distance away. Warp will take Palutena in the direction you press. |
| Palutena: Rocket Jump | Palutena propels herself with an explosion at her feet, damaging enemies nearby. It’s a little more powerful on the ground than in the air. |
| Palutena: Lightweight | This move temporarily allows Palutena to move faster and jump farther. However, it also makes her easier to damage and launch. |
| Palutena: Angelic Missile | Palutena fires herself forward like a spinning torpedo. This move travels a long way, so be careful not to fire yourself right off a cliff! |
| Palutena: Celestial Firework | There’s a moment of invincibility just after firing the firework. Use it well, and you might be able to nullify an enemy attack and then strike back! |
| Palutena: Super Speed | Palutena charges forward at speed and sends anyone in her way flying. The farther she travels, the more damage she deals on impact. |
| Palutena: Heavenly Light | This move damages anyone who touches the rays of light. It’s not particularly powerful, but it can hit repeatedly. |
| Palutena: Heavenly Light | Palutena’s Heavenly Light doesn’t cause opponents to flinch, but it does gradually push them out of its area of effect. |
| Palutena: Heavenly Light | Palutena’s Heavenly Light covers a wide area. If you hit someone with it while they’re flying off the screen, you can steal the KO for yourself. |
| Palutena: Reflect Barrier | This move creates a barrier that reflects enemy projectiles. It also pushes opponents away, so it can be useful if you want to keep your distance. |
| Pikachu: Thunder Jolt | Pikachu’s Thunder Jolt bounces along the surface of the stage. It can even attack foes who are hanging from edges. |
| Olimar: Pikmin Throw | Most Pikmin latch on to opponents and attack them repeatedly. Purple Pikmin, though, deal one heavy blow and then bounce off. |
| Olimar: Pikmin Throw | The less damage an opponent has accumulated, the longer the Pikmin can hang on to it. |
| Fox: Fox Illusion | When you use this move on the ground, Fox will always stop if he reaches an edge. When used in the air, you need to be a little more careful. |
| Dark Pit: Electroshock Arm | Dark Pit charges forward and launches foes upward at a lower angle than Pit’s Upperdash Arm. This move also deals electrical damage. |
| Dark Pit: Silver Bow | This move fires an arrow from Dark Pit’s bow, either to the side or upward. Its shots are more powerful than Pit’s Palutena Bow, but they curve less. |
| Jigglypuff: Sing | Enemies on the ground who hear this song will fall asleep. The more damage they have, the longer they’ll nap. |
| Mario: Up Smash Attack | A powerful upward headbutt. Mario’s head is invulnerable while performing it. Useful against opponents moving in to attack from above. |
| Villager: Pocket | The Villager uses this move to put items or incoming projectiles into his pocket. Then he can press the button again to take them out. |
| Villager: Timber | A three-stage move: planting a seed, watering it, and then chopping down the tree. Don’t use the first stage in the air—it’ll just leave you wide open. |
| Yoshi: Egg Roll | This move turns Yoshi into an egg that rolls along the ground. The faster it goes, the more powerful it’ll be. Just beware of getting grabbed! |
| Yoshi: Egg Lay | The more damage Yoshi’s foe has accumulated, the longer they’ll be stuck as an egg. They can escape faster by wiggling around. |
| Yoshi: Egg Throw | The angle Yoshi’s egg travels depends on the direction you press just before the egg is thrown. Push backward to throw straight up. |
| Yoshi: Egg Throw | How hard Yoshi throws the egg depends on how long you hold the button down. Tap for a light throw or hold for a powerful one. |
| Yoshi: Yoshi Bomb | The damage and launching power of the Yoshi Bomb are both a little higher when used on the ground. |
| Yoshi: Front Air Attack | Yoshi charges up for a moment and then delivers a powerful headbutt. Hit an opponent from above, and they’ll fly down with a meteor effect. |
| Charizard: Flamethrower | Charizard will keep breathing fire as long as you hold the button down, but it’ll get weaker and weaker as you use it. |
| Little Mac: Slip Counter | Just when you think you’ve got him, Little Mac socks you with a nasty counter. He’s invincible during the attack, so there’s no stopping him! |
| Little Mac: Rising Uppercut | Little Mac zooms upward with a powerful uppercut. It travels farther when used on the ground than when used in the air. |
| Little Mac: KO Uppercut | Little Mac’s Power Meter builds up when he deals or receives damage. Once it’s full, he can use the KO Uppercut to deal some serious hurt! |
| Link: Hero’s Bow | The longer Link charges his bow, the farther the arrows will fly and the more powerful they’ll be. At maximum charge, they’ll fly perfectly straight. |
| Robin: Thunder | Robin will use one of four magic spells, depending on how long you charge Thunder. The color the tome glows indicates which spell will be used. |
| Robin: Thunder | It’s difficult to notice in the middle of a battle, but the cover of the tome Robin uses actually changes depending on the spell being used. |
| Robin: Thunder | If you launch this move without charging it up, Robin will cast Thunder. It’s not very powerful, but its fast speed can take foes by surprise. |
| Robin: Thunder | Once the tome starts glowing yellow, you can cast Elthunder. It’s more powerful than Thunder and travels farther, but it’s not quite as fast. |
| Robin: Thunder | When casting Thoron, you can hold down the button to make the beam extend farther. |
| R.O.B.: Robo Burner | The Robo Burner’s fuel slowly replenishes while R.O.B. is on the ground. Be careful if you find yourself in the air a lot—it won’t refill there. |
| Wario: Wario Waft | When Wario’s bursting at the seams with gas, he’ll glow. Getting KO’d won’t release any gas, either—there’s only one way to let it out… |
| Mii Brawler: Onslaught | A flurry of kicks, followed by a powerful uppercut. This move hits the opponent quite some distance and might even KO them if it connects in midair! |
| Mii Brawler: Shot Put | Throws a metal ball diagonally upward, just like the real shot-put event. It’s effective at blocking opponents’ attempts at recovery. |
| Mii Brawler: Soaring Axe Kick | A leap up with a somersault kick, and then a swift heel-kick drop. If that falling kick connects, it delivers a powerful meteor effect. |
| Mii Brawler: Burning Dropkick | This move combines a big forward leap with a dropkick. Also it’s on fire. Charge it up for some serious power, distance, and speed. |
| Mii Swordfighter: Blade Counter | This move counters an enemy attack. The attack has slightly greater launching power than a normal attack. |
| Mii Swordfighter: Chakram | Throws a ring-shaped projectile. If it hits the stage, it’ll stick there. You can adjust the angle of the throw by pressing up and down. |
| Mii Swordfighter: Chakram | Perform this move like a smash attack to throw stronger and farther. Perform it normally, and the chakram will hover and hit multiple times. |
| Mii Swordfighter: Gale Strike | A large swing of the sword that summons a damaging tornado. The tornado’s path sinks slightly just after it appears. |
| Mii Swordfighter: Stone Scabbard | A rising upward slice followed by a plummeting stab down. The falling stab has a meteor effect. |
| Mii Swordfighter: Stone Scabbard | At the end of this move, the sword sticks right through the ground. You can use it to attack unsuspecting enemies below the platform. |
| Mii Swordfighter: Hero’s Spin | A spinning sword slice that attacks enemies on both sides. When used in midair it makes you rise upward, so you can use it for recovery. |
| Mii Swordfighter: Hero’s Spin | When using this move on the ground, you can hold down the button to charge it up. It’s also stronger in general on the ground than in the air. |
| Mii Swordfighter: Shuriken of Light | The farther the shurikens travel, the more damage they deal. Throwing them at nearby foes won’t even make them flinch. |
| Mii Swordfighter: Slash Launcher | A swift dash forward ending in a decisive slash, with the sword held in a reverse grip. The longer you charge it, the farther it will travel. |
| Mii Gunner: Arm Rocket | This move fires a rocket jet from your arm cannon, carrying you upward. You can adjust the direction by pressing left or right just before liftoff. |
| Mii Gunner: Absorbing Vortex | A barrier that absorbs energy-based projectiles. When you deactivate the barrier, it will push nearby enemies back a bit. |
| Mii Gunner: Cannon Uppercut | Fires a blast downward, using the recoil to power an uppercut. If you’re up close, you can hit your foe with both the uppercut and the blast! |
| Mii Gunner: Bomb Drop | This move rolls a bomb forward that will blow up after a set period of time or when it hits a foe. Drop one on an opponent trying to recover! |
| Mii Gunner: Grenade Launch | These grenades fly in an arc, exploding after a set time or when they hit an opponent. Hold down the button to throw them farther. |
| Mii Gunner: Stealth Burst | Fires a stealth explosive forward, which detonates when you release the button. Hold the button down to get more distance and power. |
| Mii Gunner: Gunner Missile | Use this move normally to fire a missile that homes in on opponents. Deliver it like a smash attack to fire a stronger missile that flies straight. |
| Mii Gunner: Laser Blaze | This move fires a beam from your arm cannon. It won’t make enemies flinch, but it can be fired repeatedly to build up damage. |
| Mii Gunner: Echo Reflector | This move creates a Reflector that sends projectiles back the way they came. They’ll be stronger than they were before, too! |
| Mr. Game & Watch: Fire | A pair of firemen launch Mr. Game & Watch high into the air. Nearby opponents will also be pushed back a bit. |
| Kirby: Inhale | In addition to enemies, Kirby can inhale some items. You’ll recover a little damage this way, but sucking in explosives will hurt! |
| Ganondorf: Warlock Punch | After pressing the attack button, quickly turn around to make Ganondorf unleash an even more powerful attack as he turns. |
| Shulk: Monado Arts | Jump mode increases your jumping ability. You’ll be able to move more quickly in the air, but you’ll also take more damage from attacks. |
| Zero Suit Samus: Flip Jump | Press the attack button during this move to launch a kick. This kick deals a lot of damage and has a powerful meteor effect, too. |
| Duck Hunt: Clay Shooting | Press the button once to throw a clay pigeon forward, and then press again to shoot. The third shot will hit, breaking the clay and hurting foes. |
| Duck Hunt: Trick Shot | This move kicks an exploding can toward your enemies. Keep pressing the button to fire shots and lead it toward its target. |
| Palutena: Counter | This move raises Palutena’s shield, preparing to counter an enemy attack. The counterattack itself covers a surprisingly wide range. |
| Palutena: Jump Glide | After leaping upward, Palutena glides down slowly. You can make use of this glide to cover a lot of distance in the air. |
| Palutena: Celestial Firework | This move shoots fireworks upward to attack. Besides the obvious anti-air applications, it can also be used to hit downed opponents. |
| Palutena: Explosive Flame | This move causes an explosion a short distance away from Palutena. It deals multiple hits to any opponents in its vicinity and then sends them flying. |
| Pit: Power of Flight | Pit’s wings glow and then send him flying in the direction you choose. This move travels a long way, making it an excellent recovery. |
| Jigglypuff: Rest | This move is hard to hit with but can really send opponents flying! You’ll need to get very close or use it right when your opponent tries to attack. |
| Jigglypuff: Pound | A simple punch that travels horizontally. You can use it repeatedly in midair—combine it with jumps to stay aloft for a very long time. |
| Yoshi: Egg Lay | This move grabs opponents with Yoshi’s tongue and traps them in an egg. They’ll take less damage while trapped, but you can hit them all you like! |
| Robin: Thunder | A red glow means that Thunder has charged into Arcthunder! A current with very high launching power will appear when this move connects. |
| Robin: Thunder | When Thunder is fully charged, it becomes Thoron! The high-speed beam can deal damage to multiple opponents at once. |
| Rosalina: Luma Shot | This sends Luma hurtling forward with a high chance of launching opponents. Charge up this move to send Luma flying farther. |
| R.O.B.: Robo Burner | R.O.B. will use his burner to fly up. Don’t jump—just press the special-move button repeatedly to save fuel and let yourself fly longer. |
| Mii Brawler: Ultimate Uppercut | This fierce uppercut can be charged. When fully charged, it’s super strong and has an extra-long super-armor effect at the start. |
| Mii Brawler: Exploding Side Kick | Input in the opposite direction right after pressing the button to turn around and deliver this kick the other way! It’ll also deal more damage. |
| Mii Brawler: Foot Flurry | On the ground, this flurry of kicks will move forward, ending with an upward kick. In the air, you’ll hover in place and kick downward. |
| Mii Swordfighter: Power Thrust | This dashing thrust will travel sideways on the ground but diagonally down in the air. The sword’s tip is especially powerful. |
| Mii Swordfighter: Skyward Slash Dash | Slash repeatedly while dashing in the direction you’ve pressed. Use it in the air to ambush opponents waiting below! |
| Mii Swordfighter: Gale Strike | The tornado will become weaker as time passes, but the force of the wind will still push opponents even after it stops dealing damage. |
| Magicant | Flying Man will fight alongside the first person who touches him. Get to him before anyone else has a chance! |
| Magicant | There are only five Flying Men. If all five are defeated, no more will appear in the battle. |
| Balloon Fight | This stage loops back on itself if you run to the left or right. However, getting launched can still KO you. |
| Wily Castle | The Yellow Devil explodes when defeated, which counts as your attack if you defeated it. Use this to KO other fighters! |
| Golden Plains | Collect 100 coins and you’ll turn to gold! You’ll become generally more powerful and won’t flinch at all. |
| PAC-MAZE | Collect 100 Pac-Dots, and a Power Pellet will appear just for you. You can destroy ones that appear for your rivals, too! |
| Gerudo Valley | Sometimes the wooden bridge will break if you stand on it or attack it. It’s a flimsy bridge and will break over time, too. |
| Jungle Japes | The river below the stage flows very quickly, so don’t fall in! Try to knock foes into it instead! |
| Flat Zone 2: Fire | If you leave items on the ground, a diver might appear and take them away. |
| Golden Plains | Touch the red ring to make eight red coins appear. One red coin is worth five regular coins! |
| Golden Plains | The scalelike platforms will tilt and fall if there is no one on the other side. Get two fighters on there to see who weighs more! |
| WarioWare, Inc. | When the microgame starts, follow the instructions to get items or other bonuses! |
| Flat Zone 2: Chef | You can launch the Chef off the stage by continuously hitting him. Once the Chef is gone, the stage will change to a new scene. |
| Find Mii | The Dark Emperor is capable of destroying the platforms in this stage. There are only two, so watch out! |
| Paper Mario | Watch out for the gigantic fan on the part of the stage that is on land. It’s much easier to be launched to the right when it spins! |
| Paper Mario | Bowser’s metal face will appear and spin in the sky. If his eyes turn red, it’s a good time to run! |
| Living Room | Five different kinds of puppies appear in the background. The breed will change randomly. Sometimes a kitten will appear instead! |
| Living Room | The falling blocks are really painful if they land on you. Avoid damage by watching the shadows and moving before the blocks land. |
| Spirit Train | If Link or Toon Link is busy in the battle, Alfonzo will handle being the train’s conductor. |
| Spirit Train | The Spirit Train can have several different cabooses. It could be Linebeck’s shop, a coal car, a steel-frame car, or other cars! |
| Spirit Train | Keep an eye on the black smoke from the Dark Train! It will jump before exploding, landing in a random place on the stage. |
| Magicant | A giant tomato or iron octopus will fall into the clouds, slowly sinking in until it falls out the other side. |
| Magicant | Standing on a giant tomato or an iron octopus will cause it to sink through the clouds faster. |
| Rainbow Road | Sometimes Shy Guys drive by in karts. There is plenty of warning before the Shy Guys cruise by. |
| Rainbow Road | The floor of the tunnel rotates; don’t get caught standing in one spot, or you’ll be sent flying off the screen! |
| Tomodachi Life | Normally, only rooms that fighters are currently in will be visible. If you throw an X Bomb, though, a lot will be revealed! |
| Mute City | This fight takes place on F-Zero machines in the middle of a race! Falling onto the course will hurt and send you flying through the air! |
| Unova Pokémon League | Stairs will appear and connect to N’s Castle. The stairs will make the stage larger—change up your tactics with this new space! |
| Spirit Train | The Armored Train is pointy in front and will try to push the train you are on off the stage. Don’t get pushed off during their conflict! |
| Spirit Train | This train travels left at extremely high speed. You’ll need more luck than any one fighter has if you want to survive falling off the back. |
| 3D Land: Blocks | The Brick Blocks that appear in the beginning can be easily broken by hitting them once from below. |
| 3D Land: ? Blocks | ? Blocks give you items! Super Leaves will appear slightly more often than usual. |
| 3D Land: Protruding Rocks | The mountain range partway through the stage has rocks sticking out from it. The platform tilts and pushes fighters, so watch out! |
| 3D Land: Shrinking and Growing Pipes | Pipes that shrink and grow will appear throughout the stage. Time your jumps so you don’t fall down! |
| 3D Land: Lifts on Rails | During the ocean scene, the lift will travel along rails. Look ahead to spot where lifts are going next! Find the premium fighting spot! |
| 3D Land: Spike Pillars | Spike Pillars will pop out of the ocean at random. They can break lifts and deal a lot of damage to unlucky fighters. |
| Tortimer Island | The shallow waters around the island are home to some vicious sharks. They’ll swim close and try to make a meal of an unsuspecting fighter. |
| Find Mii | The faster you can rescue the Mii trapped in the cage, the faster the Dark Emperor will leave the battle. |
| Balloon Fight | Beware the fish lurking beneath those pixelated waves—they’ll surface and try to get a mouthful of Smash Bros. fighter. |
| Paper Mario | A Big Blooper will appear on the ocean stage. Don’t worry—it won’t attack. It will rock the ship, though, generating some waves. |
| 3D Land: Donut Blocks | As tasty as they may sound, the Donut Blocks are not for eating. You can, however, jump on top of them for a bit before they collapse from your weight. |
| 3D Land: Flip Panels | The Flip Panels at the beginning of this stage will flip, gradually creating more places for you to stand. |
| 3D Land: Note Blocks | Note Blocks appear at the beginning of the stage. Jumping on them will send fighters flying into the sky! |
| 3D Land: Rotating Platforms | This rotating platform may seem like a good place to fight, but it’ll toss anyone who’s still on it when it rotates! |
| Tomodachi Life | The apartments and the Mii characters living in them will change every time you play. You might even see your friends! |
| Tortimer Island | Kapp’n’s boat will sail out to sea after some time has passed. Disembark before he sails you off the stage! |
| Tortimer Island | Durians and coconuts have no healing power, but sometimes they can explode when thrown. |
| Green Hill Zone | The object with the blue ball on top is called a Point Marker. A Point Marker will twirl when the ball is hit, dealing damage to anyone too close. |
| Distant Planet | The Red Bulborb will appear on the right, opening its mouth and looking for food. Being eaten by the Red Bulborb counts as a KO. |
| Distant Planet | The slanted hill on the left side of the stage will flood with water when it rains. The strong current can sweep you off the edge. Watch out! |
| Distant Planet | The objects labeled with numbers that blossom in the center of the flowers are called Pellets. Bigger numbers deal more damage when thrown. |
| Distant Planet | Occasionally you might see Onions fly by. Hit them with Pellets to get items! |
| PictoChat 2 | The stage changes as the background changes. Adjust your tactics depending on the drawing shown in the background. |
| Yoshi’s Island | Shy Guys sometimes appear from the sky, carrying yummy food. Attack them to make them drop their tasty snacks! |
| Unova Pokémon League | Sometimes Milotic, Whimsicott, and Shaymin will appear. Don’t worry—these three are only here to watch. |
| Unova Pokémon League | Reshiram and Zekrom will attack when they appear on this stage. You might see some other Pokémon, too! |
| Unova Pokémon League | Reshiram’s Fusion Flare move will unleash a burst of flames and then destroy the stairs, so be careful! |
| Unova Pokémon League | Zekrom, the Dragon/Electric-type Legendary Pokémon, charges in using Fusion Bolt, which breaks the stairs or leaves platforms askew. |
| Tortimer Island | Beehives will occasionally fall from the trees. Unless you like swarms of bees attacking you, be careful not to hit those beehives… |
| Find Mii | The Dark Emperor uses random magic during the battle. What effect his magic will have is displayed on the bottom screen. |
| Arena Ferox | Four types of platforms appear on this stage. Some of them can be destroyed! The statues too! |
| Boxing Ring | Use the ropes around the ring to jump high into the air. These ropes let fighters who have no ups reach the lights overhead! |
| Boxing Ring | Reach those lights hanging above the ring! Damage them enough and they’ll come crashing down, launching anyone caught beneath them. |
| Golden Plains | Step on the P Switch (or just hit it) to make blue coins appear. They won’t stay around for long, so look lively! |
| Beetle | Attack an incoming Beetle and it’ll do a U-turn. Beat the person who threw it at their own game! |
| Golden Hammer | This sometimes turns into a Squeaky Hammer. It doesn’t hurt much, but that sound sure is cute, eh? |
| Screw Attack | You can deliver air attacks while using the Screw Attack item. This can lead to powerful combos. |
| Master Ball | A purple ball with the letter M on it. Unlike a regular Poké Ball, there’s almost always a Legendary inside. |
| Boomerang | If you time it right and catch this on the way back, it’ll deal more damage next time you throw it. |
| Daybreak | After completing it, press the attack button to fire a beam. Getting hit before firing it can KO you, so be careful! |
| Blast Box | This item can be risky, since fire attacks will detonate it straight away. However, it’s safe to hit or throw it. |
| Fairy Bottle | This heals your damage by 100…unless you’re below 100% at the time, in which case you can’t use it. |
| Hocotate Bomb | While flying upward, it can hit enemies above it repeatedly and even launch them right off the screen. |
| Sandbag | Sandbag takes damage just like a fighter. The more it takes, the easier it is to launch. |
| Hocotate Bomb | The bomb detonates when it hits the ground. It has a big blast range, but the fighter who launched it is immune. |
| Lip’s Stick | If you’re hit by one of these, a flower blooms on your head and slowly does damage. It’s so pretty, it’s a shame it hurts… |
| Pokémon: Electrode | Right before an Electrode explodes, its body goes red and shrinks. That’s when you can grab it and throw it at your opponents! |
| Pokémon: Snorlax | Snorlax grows as it rises into the air. If the timing’s right, you can get every other fighter in one fell swoop! |
| Pokémon: Inkay | Inkay’s Topsy-Turvy move knocks over nearby fighters. It doesn’t work on anybody in the air, though, so try jumping! |
| Pokémon: Spewpa | If attacked, it’ll react with a blast of Stun Spore, so…you leave Spewpa alone, Spewpa leaves you alone. |
| Pokémon: Kyogre | Hydro Pump pushes fighters off the stage. It’s very difficult to escape the power of this current. |
| Pokémon: Entei | Fire Spin has a gravitational effect, sucking in anyone who touches it. Once you’re trapped in the fiery pillar, it’ll do huge damage. |
| Pokémon: Oshawott | Surf sweeps up anybody in its path—adjust your aim to catch fighters who try to get out of the way! |
| Pokémon: Dedenne | Its Discharge attack creates an electrical burst with Dedenne in the center. Fighters caught in this will take multiple hits. |
| Pokémon: Bellossom | Getting close to it will put you right to sleep! The more damage you’ve taken, the longer you’ll be counting sheep. |
| Pokémon: Mew | Mew is so rare, you’ll be lucky to see one at all—but when you do, it’ll drop rare items onto the battlefield. |
| Pokémon: Goldeen | If damage was dealt from enthusiasm, then Goldeen would KO everyone with Splash. But it isn’t. Not even when Goldeen comes from a Master Ball. |
| Pokémon: Darkrai | Its Dark Void move has a strong gravitational pull and puts anyone who touches it to sleep. If you’re caught in midair, you’ll fall to the ground, sound asleep. |
| Pokémon: Kyurem | Icy Wind freezes fighters in just one hit. Not only does the attack have a wide range, but Kyurem can keep it going for a long time. |
| Pokémon: Gardevoir | Gardevoir uses a barrier that reflects projectiles. If you summoned it, your own projectiles won’t be affected. Nice! |
| Pokémon: Gogoat | Gogoat will let you ride on its back. Charge down opponents to deal damage! |
| Pokémon: Meowth | Meowth can use Pay Day to throw coins at enemy fighters. They don’t do much damage, but the attack has a wide range. |
| Pokémon: Victini | Victini will use Victory Star to give the fighter who summoned it a boost. In a team battle, it will boost your teammates as well. |
| Pokémon: Arceus | The attack Gravity will pull fighters out of the air. Anyone caught out beyond the edge will fall straight down. |
| Pokémon: Meloetta | Meloetta’s song will bounce off walls and platforms. In smaller stages, the song will bounce unpredictably, making it tough to avoid. |
| Pokémon: Snivy | Snivy’s Razor Leaf rapidly fires at short range, but anyone caught in it will be hit over and over and over. |
| Pokémon: Metagross | Only touch Metagross if you like being buried. Anyone too slow to flee will suffer this Pokémon’s Earthquake attack. |
| Pokémon: Staryu | Staryu will pursue a target and shoot stars at high speed. For fighters with projectile-absorbing moves, this is like an early birthday present! |
| Pokémon: Moltres | Moltres slowly rises after appearing. Even barely touching this Legendary Pokémon will send a fighter flying. |
| Pokémon: Palkia | Everything gets flipped 180 degrees, changing the battlefield. The controls don’t change though, so don’t accidentally fall off! |
| Pokémon: Abomasnow | Abomasnow’s Blizzard move will pull you toward the Pokémon. Once Blizzard ends, Abomasnow will unleash Ice Punch! |
| Pokémon: Giratina | Giratina launches a massive gust of wind that hits multiple times. Be careful—this move is tough to avoid and can send you off the screen. |
| Pokémon: Lugia | Lugia will launch Aeroblast, a wide-range attack, from the back of the stage. This attack can’t be blocked—do all you can to get clear! |
| Pokémon: Genesect | Both Genesect’s laser and its Techno Blast can penetrate walls, so all you can do is stay out of its line of sight. |
| Pokémon: Chespin | Chespin will use Seed Bomb, causing explosions all around it that deal a large amount of damage to anyone hit by the attack. |
| Pokémon: Swirlix | Anyone who strays too close to Swirlix will have their movement reduced. Take advantage of this if you brought Swirlix into battle! |
| Pokémon: Zoroark | Zoroark’s Fury Swipes will smack foes down to the ground. If it gets ahold of its target again, it can use a follow-up attack. |
| Assist Trophy: Ghirahim | Ghirahim moves gracefully through the battle, using swords and knives. He can’t be defeated— he’ll simply teleport back if you launch him. |
| Assist Trophy: Skull Kid | Skull Kid calls on a variety of mystical powers when he appears in the battle. Unfortunately, these powers affect whoever summoned him, too! |
| Assist Trophy: Skull Kid | Skull Kid has three different moves: he can reverse the directional inputs, make everyone invisible, or flip the stage upside down. |
| Assist Trophy: Mother Brain | Attack Mother Brain to defeat her! The glass around her will shatter after she fires lasers— that’s your chance to strike! |
| Assist Trophy: Phosphora | Phosphora can’t be defeated when she arrives on the battlefield, only made to flinch. However, her thunder attacks can be reflected or absorbed. |
| Assist Trophy: Starman | He will shoot either a PK Beam γ or a PK Beam Ω, stunning fighters. PK Beam γ targets one fighter, but Ω is less discerning. |
| Assist Trophy: Starman | If you can keep up with his teleporting, Starman can be defeated. Reflecting or absorbing the PK Beams is a good strategy, too. |
| Assist Trophy: Ashley | A dark field will appear around Ashley. Any foes inside the field will move more slowly and take continuous damage. |
| Assist Trophy: Midna | Watch out for Midna’s hand-shaped hair. She’ll reach out and grab nearby fighters no matter how badly you wish your shield could stop it. |
| Assist Trophy: Midna | Midna won’t be abandoned in battle—she’ll teleport to chase foes. She also uses her teleport to return if she gets launched. |
| Assist Trophy: Elec Man | Elec Man will move swiftly across the stage, firing Thunder Beam at fighters. A hit from this attack will leave a fighter stunned for a time. |
| Assist Trophy: Elec Man | Attacking Elec Man will make him flinch, but you’ll have to launch him off the screen if you want to stop his lightning attacks. |
| Assist Trophy: Dark Samus | This energy-based life-form looks a lot like Samus. Dark Samus fires homing missiles and rapid-fire rounds at fighters on the stage. |
| Assist Trophy: Sheriff | Sheriff fires high-speed, powerful shots at fighters. These shots can be reflected, but absorbing them is not an option. |
| Assist Trophy: Isabelle | Isabelle is here to support whichever fighter summoned her into the battle. She’ll throw healing fruit that’s used just by touching it. |
| Assist Trophy: Ghosts | Blinky, Inky, Pinky, and Clyde will all appear on the stage! They each have their own movement patterns and will hurt opponents who touch them. |
| Fire Bar | Five fireballs are linked to the hilt of this weapon. As you attack with it, the number of fireballs decreases. |
| Fire Bar | You can use the Fire Bar both at short range and long range. The fireballs at the base of the weapon do the most damage. |
| Pokémon: Fennekin | Incinerate creates a fire pillar reaching out in front of Fennekin. If it connects, it’ll do repeated damage to fighters. |
| Assist Trophy: Ashley | Unless you summoned Ashley, eating food while within her dark field will cause damage instead of healing it. It’s Pit’s worst nightmare! |
| Assist Trophy: Ashley | Ashley causes an effect at random. She’ll make attacks miss, limit movement, flip the controls, or bury, shrink, or make invisible all the fighters. |
| Assist Trophy: Ghirahim | Ghirahim will use a dash attack at foes straight ahead. He moves swiftly—making it hard to dodge—and strikes hard enough to launch you. |
| Assist Trophy: Saki Amamiya | Depending on the location of his target, Saki may shoot or slash with his weapon. The slash is very powerful at close range, so watch out! |
| Assist Trophy: Isabelle | Isabelle cares how the fight is going! If the fighter who summoned her gets a KO, she’ll be happy! She’ll flinch if the fighters get close. |
| Assist Trophy: Isabelle | Isabelle will do her best to throw the fruit she brought to the fighter who summoned her. This doesn’t mean other fighters can’t steal it. |
| Assist Trophy: Lakitu | Lakitu’s Spiny Eggs will have a meteor effect on anyone they hit. Lakitu is perfect for stages that have small platforms. |
| Assist Trophy: Dillon | Watch out! This armadillo will attack without fear. His Arma-Charge is super powerful, so get to dodging if you see him spinning up! |
| Assist Trophy: Dark Samus | Dark Samus can be defeated by dealing enough damage. However, anyone who gets too close to her may receive a burst of Phazon energy. |
| Assist Trophy: Tingle | Every so often, Tingle will send down a shower of Hammers. Even more rarely, he’ll rain Golden Hammers on the battlefield! |
| Assist Trophy: Tingle | Tingle may sometimes become engulfed in flames! If this happens, everyone in the battle will suddenly act like they’ve consumed Superspicy Curry. |
| Assist Trophy: Tingle | Sometimes Tingle will emerge from the Assist Trophy with a big balloon on his back. He’ll rise into the sky, leaving the battle without helping. |
| Assist Trophy: Tingle | Tingle, a man with a stubby red nose and wearing an entirely green suit, randomly selects one of five different effects when summoned. |
| Assist Trophy: Color TV-Game 15 | The paddles that appear to the left and right will try to keep a ball in play. You’ll take damage and be launched if you touch them. |
| Assist Trophy: Nightmare | When Nightmare has changed from his Power Orb to his true form, the screen will go completely black, obscuring the stage. |
| Assist Trophy: Knuckle Joe | A fighter sporting a bandanna. After a rapid- fire attack, Knuckle Joe will unleash Smash Punch or Rising Break, both very powerful moves. |
| Assist Trophy: Hammer Bro | Hammer Bros. won’t move from side to side, so you can move around them and out of range. |
| Assist Trophy: Mother Brain | Mother Brain will fire ring-shaped projectiles called Rinkas from off-screen. These are energy based, so they can be absorbed or reflected. |
| Assist Trophy: Mother Brain | Mother Brain will send colorful lasers shooting up and down the screen. They can’t be absorbed or reflected, so you’ll have to just avoid them! |
| Assist Trophy: Mother Brain | It’s totally fine to use Mother Brain to shield yourself from the attacks of your rivals. |
| Assist Trophy: Lyn | Right before she strikes, Lyn will move slightly—this is your cue to dodge and avoid her attack! |
| Assist Trophy: Lyn | Lyn is a swordfighter who has perfected her Quick Draw. After she has drawn her sword, she’ll attack the nearest opponent. |
| Assist Trophy: Waluigi | Luigi’s purple-clothed rival. He only ever jumps directly up, so leaping left or right is a good way to avoid him. |
| Assist Trophy: Chain Chomp | If a Chain Chomp falls off the stage, it’ll just jump straight back up! |
| Assist Trophy: Chain Chomp | If a platform that can break is broken with one of these chained to it, the Chain Chomp will fall off the stage, as well. |
| Assist Trophy: Dr. Kawashima | Numbers will fly in from off-screen. Attack them to make them change direction. |
| Assist Trophy: Phosphora | Phosphora will teleport around the stage, dodging attacks and shooting lightning at everyone not fortunate enough to have summoned her. |
| Pokémon: Keldeo | When it uses Secret Sword, it will rush up to a fighter and deliver a powerful, wide- range slash attack with its extended horn. |
| Pokémon: Suicune | Getting hit by Aurora Beam will give you a chance to cool off. Literally. Even touching Suicune right when it appears will freeze you. |
| Pokémon: Xerneas | Everyone’s launching power will get a boost when Xerneas is around. It’ll be much easier to launch rivals who have low damage. |
| Pokémon: Deoxys | Hyper Beam draws in fighters, but it won’t hurt for you to launch them toward Deoxys, too. |
| Pokémon: Fletchling | Once Fletchling settles on a target, it can be a real pest. Strike while your foes are distracted by this little Pokémon’s attacks! |
| Boss Galaga | If you get caught up in Boss Galaga’s tractor beam, you’ll be pulled right up off the stage. Wiggle back and forth quickly to escape! |
| Boss Galaga | It’s possible to defeat Boss Galaga! He’ll change color as he takes damage. The bluer he gets, the weaker he’s becoming! |
| Lip’s Stick | Using Lip’s Stick to damage a foe will make a flower bloom. The flower grows as you continue to deal damage. |
| Assist Trophy: Devil | The Devil will begin pointing in various directions, and the stage will shift that way. If you get slid off the screen, you’ll get KO’d! |
| Assist Trophy: Ghosts | Blinky will always take the quickest route to a foe. Inky, meanwhile, prefers to move randomly in a direction opposite the foe. |
| Assist Trophy: Ghosts | Pinky will try to catch her target out by getting in front and ambushing them. Clyde doesn’t have a target—he just does whatever he likes. |
| Assist Trophy: Chain Chomp | A Chain Chomp’s chomp will deal more damage than just touching one. Be careful, though; even chained up, they’ve got a long range. |
| Pokémon: Eevee | Eevee will use Take Down on any fighters nearby. If there aren’t any, it’ll just stand around looking a bit confused. |
| Items on Floating Platforms | In Multi-Man Smash, items occasionally float by on a platform. These aren’t random—the same items will appear at the same time in every battle. |
| Classic: Route Map | The paths are marked with a color to show their difficulty: blue, green, or red. The harder the path, the better the reward! |
| All-Star: Rest Area | In the rest area between matches in All-Star, moves that normally heal you…won’t. |
| Smash Run: Powers | The number of Powers a fighter can carry depends on the fighter’s weight—the heavier the fighter, the more they can manage. |
| Smash Run: Ranks and Prizes | After the final fight, you’ll find out your ranking. You’ll earn better and rarer items by placing higher! |
| Smash Run: Participants and Prizes | The more people you play with in Smash Run, the more prizes you’ll all receive at the end. |
| Enemies: Orne | Ornes are dangerous foes. Just touching one will KO you instantly. When you hear that eerie music, run! Run away! |
| Stat Boosts | Just running and attacking will slowly boost your speed and attack stats. |
| Rare Items | Looking for cool stuff like trophies and custom parts? Try defeating bonus enemies and opening treasure chests. |
| Glunders, Glices, and Glires | They all roll along the ground, but they’re based on different elements. Glire is red, Glice is blue, and Glunder is yellow. |
| Enemies: Glice | An icy enemy that’s weak to fire. Its attack range is small, but you’ll freeze if it hits you. |
| Enemies: Glire | A fiery enemy that’s weak to ice. It attacks slowly but deals a lot of damage. |
| Cannonball Effect | When you defeat an enemy, it will fly off like a cannonball and deal damage to other enemies it hits. |
| Enemies: Goomba | The classic Mario enemy. Punches and kicks will work, but jumping on it delivers a one-hit KO in trademark Mario style. |
| Enemies: Big Goomba | Its health and attack power may be high, but you can stomp on it to do massive damage. A Goomba’s still a Goomba! |
| Enemies: Mimicutie | Lures you in disguised as a treasure chest, and then comes after you. Often drops Powers and other rarities. |
| Enemies: Glunder | An electrical enemy with no particular weakness but fairly low health. Its attacks are wide ranging but deal little damage. |
| Powerful Enemies | Strong enemies like Reapers drop lots of items. These can include rare rewards. |
| Enemies: Gastly | A Ghost-type Pokémon unaffected by punches and kicks. You’ll have to use projectiles to defeat it. |
| Enemies: Bubble | Red Bubbles are weak to water and electricity, blue ones to fire. Attack accordingly to extinguish their colored flame and weaken them. |
| Enemies: Megonta | This pill bug look-alike attacks by rolling at you. It’s invincible while balled up, so strike wisely. |
| Enemies: Darknut | Breaking a Darknut’s armor changes its attack pattern and raises its speed, but your attacks will now make it flinch. |
| Enemies: Chain Chomp | You can’t defeat a Chain Chomp—just the post it’s chained to. Once free, it will run off and leave behind an item. |
| Enemies: Polar Bear | Polar bears are weak to fire attacks. They’ll flinch when struck by fire, making them far easier to defeat. |
| Enemies: Flame Chomp | Don’t touch the Flame Chomp’s fireballs! That means both the ones it fires at you and the ones that are still attached to its tail. |
| Enemies: Flame Chomp | When a Flame Chomp’s tail is gone, its eyes will droop and it will flash. Defeat it quickly or it will explode! |
| Enemies: Peahat | Peahats will keep sending Peahat Larvae at you. These are hard to avoid because of their scattered flight patterns. |
| Enemies: Reaper | If a Reaper spots you, its special music will play and it’ll go berserk. It’ll also summon Reapettes, making it hard to even get close. |
| Enemies: Octorok | Octoroks will fire rocks at distant fighters. Deflecting an Octorok’s own rock back at it is a one-hit KO! |
| Enemies: Spike Top | Projectiles have no effect on Spike Tops, and these shelled beasts don’t flinch easily either. Give them a toss instead. |
| Enemies: Kamek | Kamek flies around and teleports, making an air battle all but inevitable. Try to ground this goof with a strong attack. |
| Enemies: Souflee | These cake-shaped enemies like to run away from the player. In typical bonus-enemy fashion, they drop excellent stat boosts if you catch them. |
| Enemies: Darknut | Darknuts attack by swinging their large swords around. Their shields deflect attacks, so try to hit them from behind! |
| Enemies: Poppant | Poppants store candy and gift-wrapped boxes in their bucket-like lower bodies. Defeat these bonus enemies for some sweet rewards! |
| Enemies: Poppant | Poppants will run away if you get too close or attack them. They’ll also throw stones and Bob-ombs in their wake! Watch out! |
| Enemies: Polar Bear | When a polar bear jumps, you should jump too. The earthquake from their landing won’t affect you if you’re in the air. |
| Area Lockdown | When the screen locks in place and swarms of enemies start to appear, hold your ground. Leaving the screen then will count as a KO. |
| Enemies: Bumpety Bomb | Bumpety Bombs flash more and more quickly as they get closer to exploding. The blast hurts other enemies, too, so use that to your advantage! |
| Launching Foes Off-Screen | Launching enemies off the screen will defeat them even if they haven’t taken much damage. However, you won’t get as many stat boosts. |
| Enemies: ReDead | Fighters on the ground will be left shaking if a ReDead’s screech hits them, but airborne fighters will keep their wits about them. |
| Enemies: Tac | Tac will fire his hand at you to try and steal your stat boosts. If he gets them, defeat him before he runs away or they’ll be gone for good! |
| Enemies: Tiki Buzz | From time to time, one of these drumlike enemies will swoop down to attack you. Jump on its head midswoop to take it out in one hit. |
| Enemies: Koffing | Get too close, and you’ll be sprayed with an extra-powerful Poison Gas that reduces your stats more than regular Poison Gas. |
| Enemies: Cucco | When a Cucco gets hurt—even by defeated enemies cannonballing toward it—it’ll call upon its flock to strike back at you. |
| Enemies: Bacura | Bacuras are invincible spinning boards that can reflect projectiles. Touching one will launch you downward. |
| Enemies: Octorok | When you get close to an Octorok, it’ll hide in the grass. You won’t be able to hit it with attacks, but you can still throw it. |
| Enemies: Bubble | These flying skulls with wings come in two varieties. Red flames indicate a fire element, while blue flames indicate ice. |
| Enemies: Zuree | These ghosts with big claws are impossible to hit before they take physical form. When they attack, that’s your chance to strike back. |
| Enemies: Clubberskull | Once freed, a Clubberskull will swing its arms in wide circles, dealing a lot of damage if it lands hits. Best to fight at a distance if you can. |
| Area Lockdown | The number in the top left is your target number of enemies to beat. Hit that mark, and you’ll get an especially large stat boost! |
| Event: Treasure Trove | This event unlocks a treasure trove full of…you guessed it…treasure! Check your map to see where it is. |
| Enemies: Koffing | This Pokémon fills its body up with toxic gases like a balloon. If its Poison Gas move hits you, it’ll reduce your stats. |
| Enemies: Flage | This slimy green foe disappears and moves closer to you. Its shadow will give away where it is heading. |
| Enemies: Boom Stomper | Don’t expect your attacks to do a lot to a Boom Stomper’s rock-solid body. Aim for its weak point: the leaf on its head. |
| Enemies: Clubberskull | When a Clubberskull’s on a rampage, it’ll come after fighters relentlessly. It’ll even jump over walls and other obstacles! |
| Enemies: Megonta | Hit a Megonta’s weak point—the stomach—and you can topple it over. It can’t do anything until it gets back up, so you have a chance to strike. |
| Enemies: Bulborb | Bulborbs will use a slam attack if there’s a fighter behind them. It can hurt a lot, but it also leaves the Bulborb open to counterattacks. |
| Enemies: Reaper | An angry Reaper won’t move around—it’ll just turn to the left and right. If you’re right in front of it, it’ll swing its scythe. |
| Enemies: Reapette | These Reaper minions can pass right through walls. They’ll disappear in one hit, so it’s easy to clear them out with some careful aim. |
| Enemies: Bonkers | This gorilla-like foe uses a hammer to strike with a variety of attacks. When he charges up Hammer Flip, it can hit you for serious pain. |
| Enemies: Bonkers | Bonkers is so tough that your attacks won’t make him flinch at all. However, he does leave himself wide open after swinging his hammer. |
| Enemies: Devil Car | If you’re close by when a Devil Car has stopped moving, it’ll spout exhaust fumes that paralyze you. It’s enough to drive anyone crazy… |
| Enemies: ReDead | These shambling creatures made from magically animated clay will let out a hideous screech if you come near, leaving you shaking. |
| Enemies: Lurchthorn | These fishlike foes pull five cannons along behind them. Each cannon takes damage on its own, but defeating the head can save you some time. |
| Powers and Speed | Slower fighters can carry more Powers. Putting on equipment that makes you faster or slower will affect this, too! |
| Enemies: Starman | Starmen are aliens that move by teleporting and unleash PK Beam attacks. These beams will briefly paralyze you if they hit, so watch out! |
| Enemies: Starman | Reflect a PK Beam back at a Starman to defeat it in one satisfying hit. However, this trick won’t work on a Starman summoned as an Assist Trophy. |
| Enemies: Spike Top | Hitting Spike Tops can flip them over. That’s the only time projectiles can hurt them. |
| Enemies: Tiki Buzz | Bounce off one of these for a big jump. It might even let you reach places you couldn’t get to before! |
| Enemies: Bumpety Bomb | You can’t hit a Bumpety Bomb through the armor on its front. Instead, attack from behind or try to throw it. |
| Enemies: Cryogonal | This Ice-type Pokémon floats in the air and fires an Ice Beam. If the beam hits you, you’ll be frozen. |
| Enemies: Daphne | Looks can be deceiving! These cute, flowery foes float along dropping mines that will flash and then explode when a fighter comes near. |
| Enemies: Daphne | A Daphne’s mines will explode if you attack them. Best to use projectiles to take them out from a comfortable distance. |
| Enemies: Pooka | These red little enemies with goggles will walk up to fighters and tackle them. |
| Enemies: Pooka | Each time a Pooka takes damage, it’ll puff up like a balloon. When it finally pops, the blast will damage surrounding enemies. |
| Enemies: Kihunter | These insectoid enemies spit acid at you from the air. Touching the acid will paralyze you for a short time. |
| Enemies: Kihunter | Kihunters won’t spit acid at you if they’re below you. Fighting them from above is an excellent strategy. |
| Enemies: Blue Shy Guy | Blue Shy Guys have slightly more health than other Shy Guys. They tend to drop Defense boosts. |
| Enemies: Yellow Shy Guy | Yellow Shy Guys jump slightly higher than other Shy Guys. They tend to drop Jump boosts. |
| Enemies: Green Shy Guy | Green Shy Guys move slightly faster than other Shy Guys. They tend to drop Speed boosts. |
| Enemies: Iridescent Glint Beetle | These golden bugs stay underground until a fighter comes near. They’re bonus enemies, and often when you launch one, it’ll drop some gold. |
| Enemies: Iridescent Glint Beetle | The farther you launch one of these, the more gold it’ll drop. It’ll go back underground if it gets launched five times or if enough time passes. |
| Enemies: Monoeye | These enormous eyeballs fly around above you, occasionally targeting you with energy blasts. |
| Enemies: Shotzo | Depending on the type, these indestructible cannons will either fire three shots in a fixed direction or one shot aimed at you. |
| Enemies: Fly Guy | A type of Shy Guy that flies around, dangling items. Sometimes they even carry custom parts! |
| Enemies: Nutski | These airborne enemies from the Forces of Nature fire either a burst of weak seeds or a single big seed that deals more damage. |
| Enemies: Hammer Bro | Hammer Bros. jump up and down while throwing hammers. The hammers bounce off the walls and floor, so watch out! |
| Enemies: Lakitu | Lakitus ride on a cloud and throw down Spiny Eggs. These turn into Spinies when they hit the ground. |
| Enemies: Roturret | Roturrets hang in the air and fire three shots from each of their two cannons. The last pair of shots has extra launching power. |
| Enemies: Reo | These enemies swoop down from above to tackle fighters. However, they can’t actually hit you if you’re directly below them. Give it a try! |
| Enemies: Generator | Generators disappear after they’ve finished spawning enemies. Defeat them before they finish to get a big bounty as a reward! |
| Enemies: Bill Blaster | These fire Bullet Bills (and sometimes other enemies). Destroy a Bill Blaster before it’s out of ammo, and you might just get extra items. |
| Event: Heavenly Light | A light engulfs the fighters, causing damage to nearby enemies. The effect is just like the Power of the same name. |
| Event: Fast Learner | One stat will be easier to upgrade for a while. Stat boosts for it will appear more frequently, and it’ll upgrade more quickly from play, too. |
| Event: Bonus Time | During this event, enemies will drop more stat boosts. This is a good chance to really raise those numbers! |
| Enemies: Devil Car | These cars are the most inconsiderate drivers, trying to ram right into you! If one hits you at high speed, it’ll hurt. |
| Enemies: Lurchthorn | Each of a Lurchthorn’s cannons will drop items and stop shooting if you destroy it. However, the other cannons will get stronger as a result. |
| Enemies: Banzai Bill | These enormous versions of Bullet Bills have a LOT of health. They also explode with a big blast radius after getting stuck in the terrain. |
| Using Powers | Using Powers aggressively at the start will let you beat enemies easily for some early stat boosts. That’ll make later foes easier too. |
| Using Powers | If you get KO’d in Smash Run, your stats will go down. Try to keep some good Powers in reserve to help you stay in the game! |
| Enemies: Bullet Bill | These bullets with angry eyes and angry fists will either fly in a straight line or chase after fighters. |
| Enemies: Kritter | Green Kritters will try to bite you, while blue Kritters will use their claws in a spinning jump attack. |
| Enemies: Gordo | These spiky little balls are invincible, and just touching one will hurt and send you reeling. |
| Enemies: Geemer | Geemers can crawl along the ground, the walls… even the ceiling! Those spikes will hurt any fighter who touches them. |
| Enemies: Sneaky Spirits | These rhythmic spooks pop up at regular intervals. Defeat one of these bonus enemies to get great rewards, like stat boosts for all stats. |
| Enemies: Lethinium | These floral fiends shoot lasers that can go through the terrain. If the beam doesn’t hit, the next shot will be at a different angle. |
| Enemies: Pooka | Pookas can chase after you by burrowing through walls and the ground. While doing this, you can’t hit them, only look at their goggles. |
| Enemies: Plasma Wisp | When these glowing foes have fully charged their attack to its third level, they become immune to projectiles and direct attacks. |
| Enemies: Cryogonal | Sometimes Cryogonals will fire an Ice Beam that mows down everything around them. This takes longer to charge than the usual beam. |
| Enemies: Bronto Burt | Bronto Burts fly around and try to hit you with their spin attack. The attack doesn’t do much damage but has high launching power. |
| Enemies: Shy Guy | Red Shy Guys have more attack power than other Shy Guys. They tend to drop Attack stat boosts. |
| Enemies: Types of Shy Guys | Shy Guys come in four colors: red, blue, yellow, and green. They have different abilities and tend to drop different stat boosts. |
| Enemies: Skuttler Cannoneer | The color of the cannon shows which type it is. Blue = beam, green = bazooka, and red = missile. |
| Enemies: Skuttler Mage | These one-eyed enemies use magic to lower your stats. They’re tough, but that only means a greater bounty of stat boosts once you defeat them. |
| Enemies: Mahva | These fishlike foes with six eyes can protect other enemies with their barriers. Break down the barrier first—then you can hit the Mahva. |
| Enemies: Mettaur | When a Mettaur’s hiding under its helmet, attacking it won’t accomplish anything. However, you can still grab and throw it. |
| Enemies: Metroid | These alien creatures float around and then try to clamp down on you with their sharp fangs. Quickly struggle to break free from their grasp. |
| Enemies: Parasol Waddle Dee | Attack a Waddle Dee to make it let go of its parasol. As the parasol floats into the air, it can snag you and carry you with it. Watch out! |
| Enemies: Peahat Larva | These weak enemies are thrown by Peahats. You can even defeat them with moves that don’t deal any damage, like Mario’s F.L.U.D.D. |
| Enemies: Petilil | This Grass-type Pokémon’s Sleep Powder move will only affect fighters on the ground. |
| Challenge Doors | Go into the red door if you are ready for a challenge! If you clear the challenge, you can get great rewards! |
| Challenge Doors | Sometimes there won’t be a challenge behind the door at all. Just a bonus room full of treasure chests and stat boosts! |
| Smash Run: Edge of the Stage | There are a lot of challenge doors and treasure chests around the edges of the labyrinth—but lots of strong enemies, too. |
| Challenges: Defeat them all! | Defeat all the enemies in the time allotted. Be careful not to fall off the narrow platforms as you fight! |
| Challenges: Defeat them all! | If you touch the floor under the platforms when it’s red, you’ll be KO’d immediately. That applies to foes, too, so try to send them to their doom! |
| Challenges: Crystal Smash! | Break all the crystals in the time allotted. Breaking them gets you stat boosts! |
| Stat Boosts: Special | Some special moves won’t just deal more damage—they’ll also take less time to charge or have an expanded range. |
| Stat Boosts: Arms | Arms stat boosts will improve throwing moves and attacks using items. They also make healing items more effective. |
| Stat Boosts: Defense | Improving your Defense means you’ll take less damage and your shield will be more durable. It’ll also be easier to achieve a perfect shield. |
| Star-Shaped Stat Boosts | These star-shaped stat boosts will improve all six stats. You’ll get them from treasure chests or by defeating special enemies. |
| Stat Megaboost | These items will double the effectiveness of stat boosts for a short time. You’ll power up twice as fast while moving around, too! |
| Cannonball Effect | When you defeat a large foe, the cannonball effect can take out other enemies, too. However, the other enemies won’t fly off like cannonballs. |
| Events: Amped Up! | For a short time, your Speed and Jump stats will be maxed out. This lets you reach all kinds of places—but be careful not to go too far! |
| Events: Fests | Loads of a single enemy will appear. The name of the fest tells you which one. A Souflee Fest is a chance to get tons of stat boosts! |
| Challenges: Crystal Smash! | When you’re attacking crystals, sometimes large cracks will appear. Aim your attacks at these to destroy the crystals more efficiently. |
| Stat Boosts: Arms | One effect of Arms stat boosts is to increase your grabbing range. They also make you less likely to drop items when attacked. |
| Breaking Your Fall | When you hit the wall, floor, or ceiling after being launched, press the shield button to break your fall and avoid follow-up attacks. |
| Grabbing Edges | If you grab an edge that someone else is grabbing, you’ll steal it from them. So much for first come, first served! |
| Footstool Jump | You can jump on an opponent’s head and use them as a springboard. If they’re airborne, they’ll fall down, too. |
| Clinging to Walls | Some fighters can temporarily stick to walls if you keep holding in the direction of the wall. Not every wall is good for this move, though… |
| Crouch Walking | Some fighters can move while crouched if you input diagonally down to the left or right. |
| Hitstun Shuffling | Input in a direction while taking damage, and you’ll shift slightly in that direction. |
| Shield Break | While your shield is up, it’ll gradually get smaller. When it finally breaks, you’ll become dizzy. |
| Super Armor | This is a state where you won’t flinch even while taking damage. Some specials will trigger this. |
| Turning and Grabbing | If you turn around while running and then grab, your grabbing range will be longer than usual. |
| Eating While Prone | Press the attack button while you’re prone to eat a food item that’s fallen nearby. |
| Wall Jumping | Some fighters can jump off walls. Input in the opposite direction while touching the wall to do this. |
| Low Jump | Press the jump button very briefly and you’ll jump lower than usual, letting you use air attacks against ground-level foes. |
| Shifting Your Shield | You can gently input a direction while shielding to move your shield. This lets you block effectively, even with a small shield. |
| Meteor Smash | Launching an opponent straight downward is known as a Meteor Smash. Doing this when there isn’t a platform below is a good one-hit KO method. |
| Perfect Shield | Shielding right before an attack results in a perfect shield. You’ll be able to strike back immediately after guarding. |
| Catching Items | You can catch items thrown at you by pressing the attack button at just the right time. |
| Smash Throw | When you throw an item, quickly press in the same direction as your throw. You’ll throw it farther than usual that way. |
| Letting Go of Items | Press the grab button to drop the item you’re holding. Even an item dropped like this deals a small amount of damage. |
| Stale Moves | Using the same attack constantly will decrease its power. Add a little variety to your fighting, and spice up your game! |
| Equipment | Fighters can carry up to three pieces of equipment. Carrying different equipment can really change the way you play a fighter! |
| Types of Equipment | Equipment can affect either attack, defense, or speed. You can equip more than one piece of the same type. |
| Strong Equipment | Taking on higher intensity levels in Classic mode or achieving high scores in minigames can hugely affect the power of the equipment you pick up. |
| Custom Special Moves | Each of the custom special moves have different attributes. Choose carefully to create the perfect fighter for your play style! |
| Bonus Effects | You can equip multiple pieces of equipment with the same bonus effect to make that effect stronger. |
| Magnifying-Glass Damage | When you move off-screen, you’ll be shown in a little circle. You’ll gradually take damage while off the screen, so don’t linger! |
| Throwing Items | Drop items by pressing the grab button. Input a direction when you drop an item to throw the item in that direction. |
| Mii Fighters’ Physiques | The physique of the Mii your Mii Fighter was based on will affect it! A big Mii is stronger, while a smaller Mii is faster. |
| Easy Final Smash | Fighters who are really lagging behind will sometimes be ready to use a Final Smash as soon as they return from being KO’d. |
| Grab | You have to wait at least a second between letting go of an opponent and grabbing them again, so be patient! |
| Shieldstun Shuffling | Angling to one side or the other while blocking with your shield will move it very slightly in that direction. |
| Grab an Item While Airborne | You can grab an item in midair by dodging or attacking at just the right time. |
| Interacting with Equipment | Using equipment that raises attack will lower defense at the same time. You know what they say—the best defense is a good offense! |
Latest posts by PushDustIn (see all)
- Smash Ultimate Development Timeline - May 16, 2020
- Straight from the Source: Koji Igarashi on Castlevania in Smash, Bloodstained - October 16, 2018
- Sakurai Discusses Isabelle, Echoes, and Newcomers - September 26, 2018
Tagged with: 3DS, Cruel Melee, CSS, custom move, Luigi, Mario, Masahiro Sakurai, Nintendo 3DS, Peach, Smash, Smash Bomb, Smash Brothers, Smash Run, Super Smash Brothers, Wario